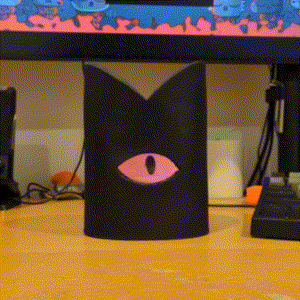
I made a prop replica of the Red Crown to wear to INDOCTRINATE, a Cult of the Lamb themed party run by its Australian game studio Massive Monster.

While there are plenty of examples online of people recreating the crown, I found that all of them had static eyes, sometimes with led lighting. The crown is supposed to be a very expressive and alive creature and I knew I had to give my prop the ability to look around and blink. This was an opportunity for me make the first Red Crown in the world with an animated eye (as far as I know).
LCD Screen
While I did float around some ideas of a mechanical eye mechanism, I ended up choosing to use an LCD screen instead. Not only would it let me animate the eye with much more freedom, the eye would have to be illuminated anyway and the screen has that covered. I also think the final result looks closer to the in game model than any mechanical system could have achieved.
The ESP32 Cheap Yellow Display (officially called “ESP32-2432S028R”) is a popular development board that contains an ESP32 microcontroller, 2.8″ 320×240 LCD display, touch screen, SD card slot and LED. It’s a nice cheap and compact package which allows you to make simple projects which require a screen. While a Raspberry Pi and an LCD screen would have been MUCH easier to implement (as you will see), it would have about 5x the cost of the entire project as well have been absolute overkill for the amount of computing actually required.
The ESP32 is not powerful enough to display GIFs let alone video files. Despite this, animated graphics are still possible although they have to be procedural which was perfect because I wanted the animations to be randomly procedurally generated anyway.
Graphics
As the screen was 320×240 pixels, I decided to design the eye in the pixel art editor Asesprite (it’s the most popular pixel art tool used by indie game developers), though any image editor would have sufficed. I separated the eye into 3 layers: the eyelid, the eye and the pupil. This way, each layer could be puppeted separately.


The Light and Versatile Graphics Library (LVGL) allows microcontrollers to generate graphics on VERY light hardware. Through their Arduino library, I was able to write code to randomly procedurally animate. Here’s a simplified explanation of the animation rules (a detailed explanation is on the GitHub repo):
- The pupil will periodically attempt to look in a random location
- If the chosen location is within a threshold distance from the center, it will remain there until the next blink, then continue moving
- The eyelid will blink periodically
I really liked the decision to make the eye linger in the middle as if it was nervous and pretending to be static; it makes the rare moments where it does wander around that touch more magical.
If anyone is interested in creating their own animations using LVGL for Arduino, images have to be converted to a .h format. This can be done by first using the LVGL Image Converter to convert images into a .c format (use the RGB565 color format) then use the Python script I included in the repo to convert from .c to .h.
Foam Work
For the body of the Crown, I followed this tutorial by Lilla Bee Cosplay, but I made mine much more oblong. I think the crown looks much more accurate in this shape and it also conforms more to the LCD screen.
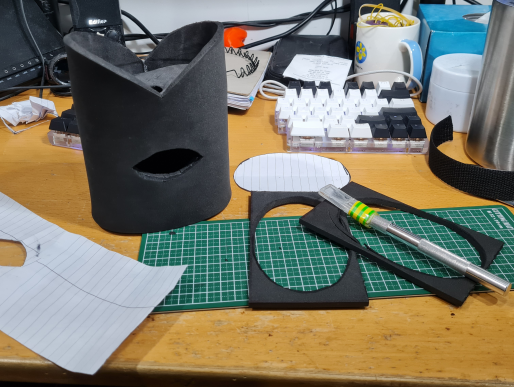
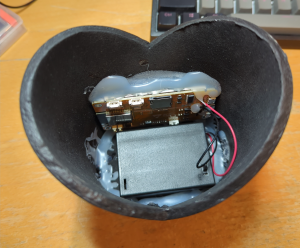
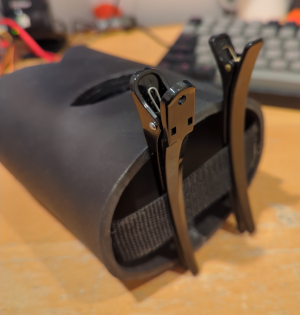
To seal the foam and give it much needed texture, I used a black truck bed liner. Then I added a bit of padding behind the eye to make it slightly flatter to accommodate the screen and hot glued the screen in place. I also hot glued some webbing on the bottom which hair clips could attach to (and hold the crown on my head). The top also has a lid to cover up the electronics (not pictured).
Overall, I’m very happy with this prop and it was a great learning experience for me. I got some experience making with foam as well as programming graphics on Arduino.
Code available on Github here.
Leave a Reply