
Here in the sun cancer capital of the world, going outside means I have to choose between wearing a hat or wearing headphones. My favourite hat is a broad brim kangaroo leather hat, while the headphones I put up with are over ears. I prefer them over wireless earphones and the like because they’ll never be as good at noise cancelling without proper ear cups. But I’ve always wondered what if the headband didn’t have to be vertical. The clamping force of headphones seems adequate to keep them on my head so what if it ran horizontally across the back of my head so I could wear a hat on top?
Previously
The biggest block for me from starting on this project was having no idea what shape would comfortably clamp my head. On previous attempts, I made very rough measurements of my head and designed a new headband for a broken pair of headphones I had. I didn’t get very far. I was going to eventually build up to modifying my daily headphones anyway, so I put aside my fears of breaking it and pulled it apart.
QuietComfort’s

I don’t call Bose QuietComfort’s my favourite headphones because I used to have a pair of QC35 II’s which despite being the older model had much more reliable bluetooth connection that switched between devices more reliably and did not spew static on weak disconnection. Also the anti-SEO marketing team that named the successor to the “QuietComfort 35” and “QuietComfort45” as the “QuietComfort” needs to be fired.
There isn’t an iFixit manual for this specific model but the cups hinge on a wishbone shaped part made of 2 pieces. Unscrew the 2 screws connecting them, slide out the inner piece and slowly force out the outer one (it’s flexible). Then I removed the 2 screws on each adjustable section to loosen the upper hinge knuckles as well as the accordioned cable inside. Trying to remove this knuckle piece would involve desoldering or splicing wires which I really didn’t want to do. Luckily the accordioned section of the cable was long enough to stretch across the outside of each earcup towards the back of my head. While I would have freed the cable from the headband, it appeared to be plastic welded into it.
Design

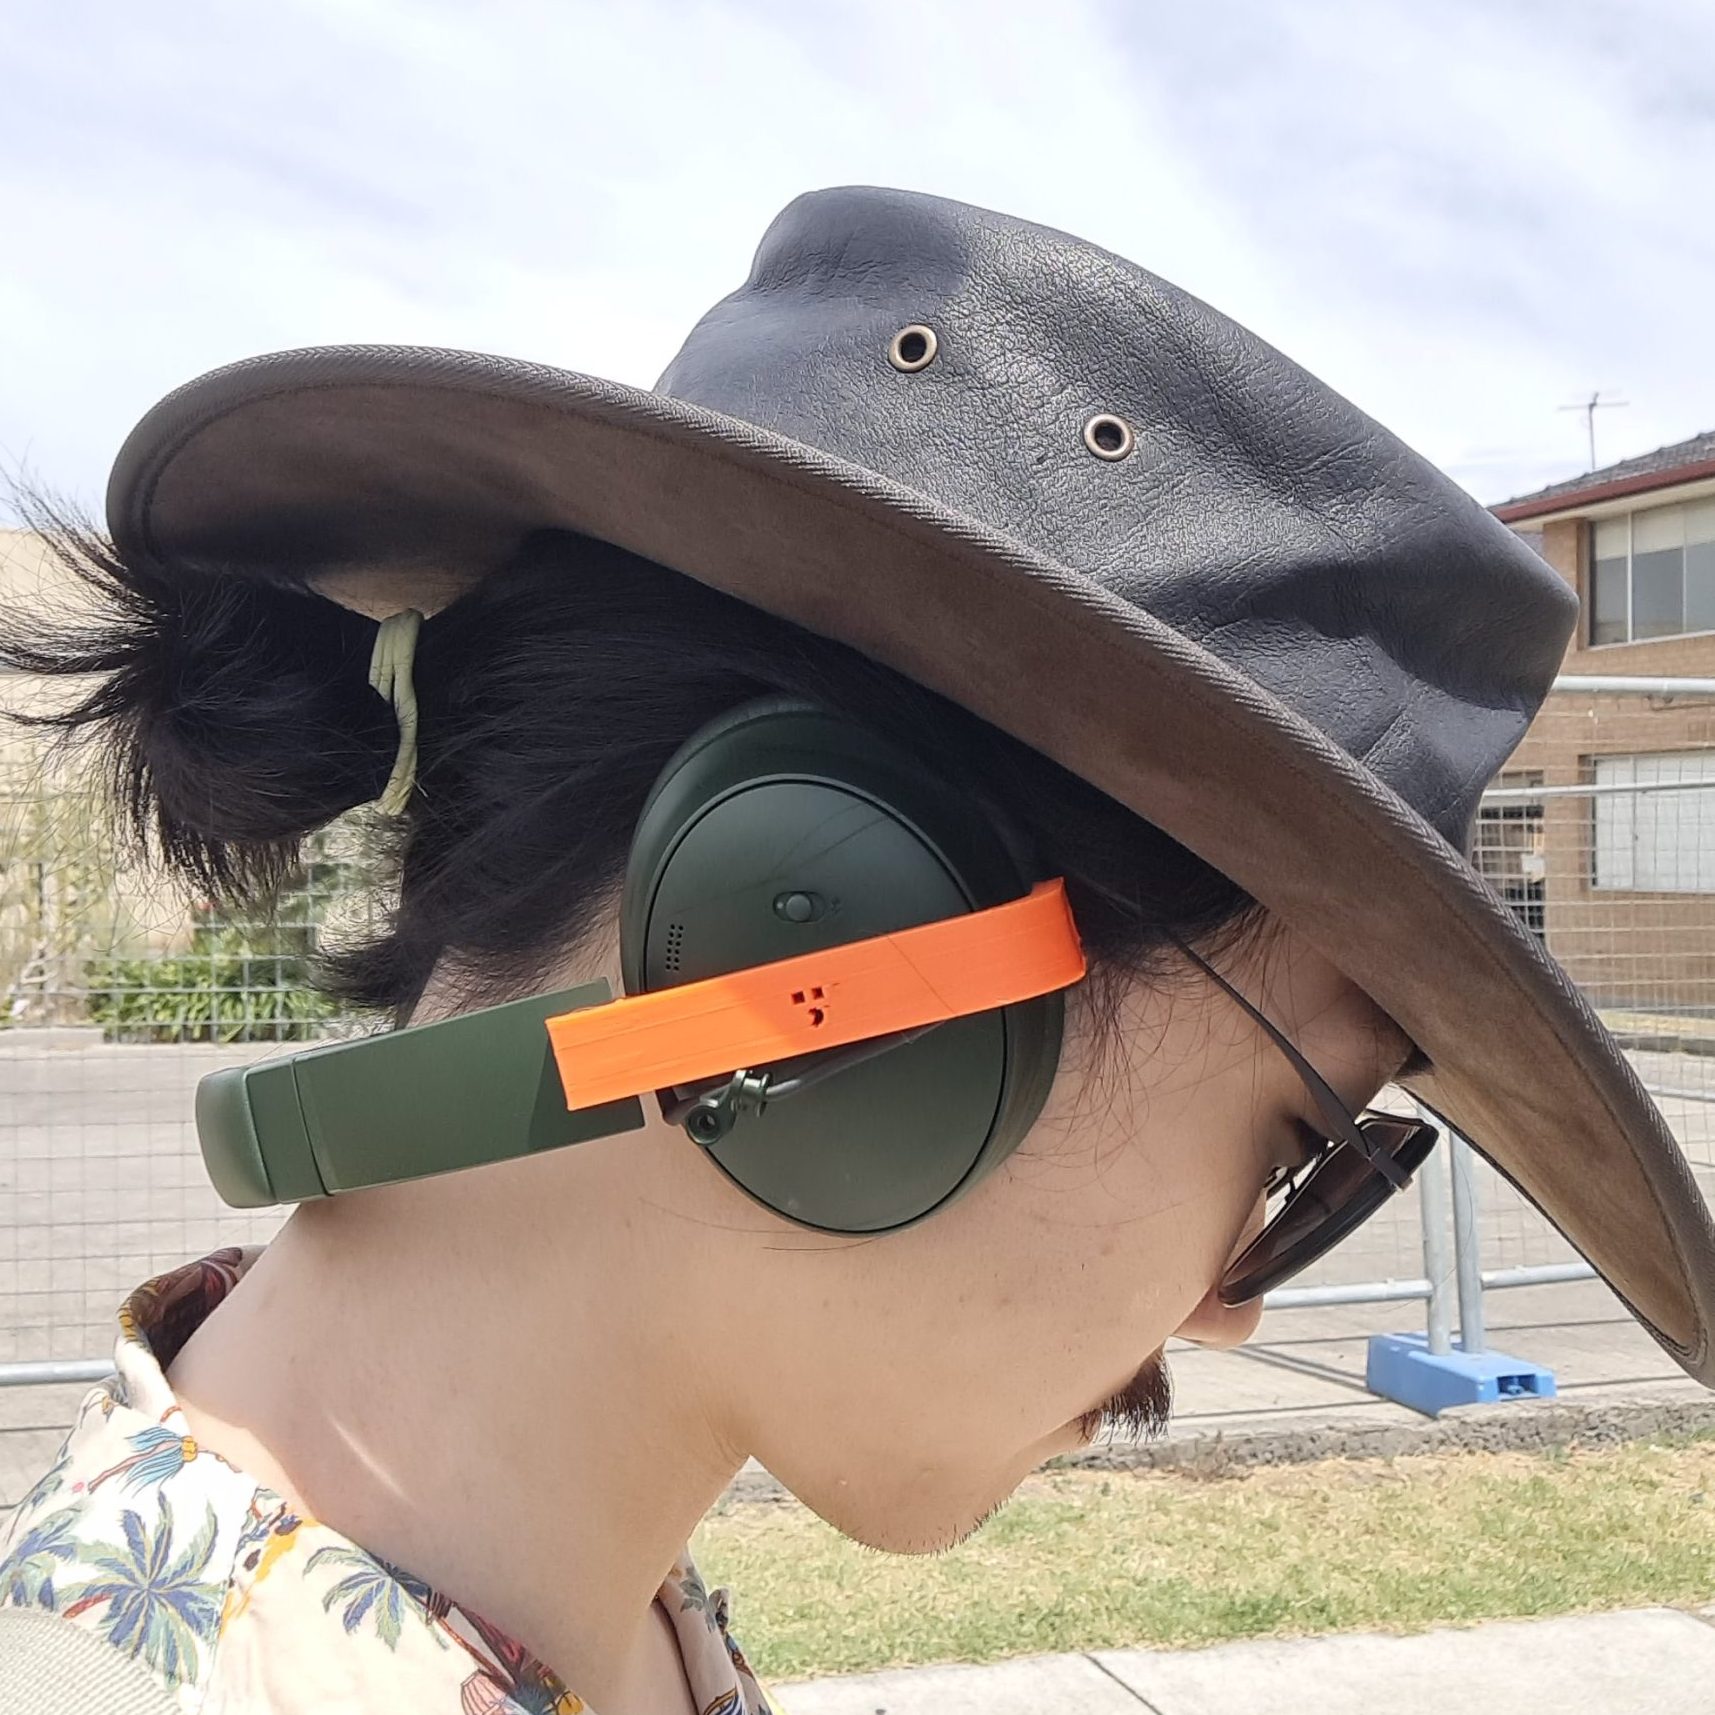
All I needed to replace in the end was the wishbone pieces which allowed the headphones to hinge in 2 directions: to let it fold and adjust to the shape of the head. One each cup, 2 pins were designed to go where the original wishbone nubs went in; a c-shaped piece would snap over the pins and attach to the headband. Pointing the headband collinearly to the straight of the c-shape fit fine around my head; the ear cups were pointed 10 degrees inward to fit flush over my ears. The headband has springsteel running through it which provides a perfect amount of clamping force.
Screw It
While running to reach a traffic light, the c-shape snapped out of the pins (which I lost), leaving an earcup dangling. Getting home, I redesigned it to accommodate self-tapping screws. Note I that I used hex sockets because stripping and camming out of Phillips heads makes me curse at Henry Ford.

What Now?
Wearing them for a while now, I think I can see why manufacturers don’t make this as a product. If the clamping is not perfect, the weight rests on the top of the ears; my ears do feel tired if I wear them too long, although most of the weight is supported by clamping. Another downside is that I can’t stretch my neck backwards but I imagine a more form-fitting design would allow me to. Yet another sacrifice my design makes is that the headphones can’t fold anymore and therefore does not fit inside its case. In the future, I hope to get my hands on a 3D scanner and design a better version that fixes these issues as well as properly enclose the cables instead of leaving them hanging out like they do now.
This project is not in a shareable state so I will not publish the models.
I later lost these pair of headphones. 🙁
Leave a Reply